
DIY Dining Table
- Katie Moore
- May 25, 2020
- 5 min read
Hello all!
We finally got our dining nook completely put together and I'm so excited to finally have a place to eat!

When we first bought the house we weren't sure exactly what we were going to do with this area. It has slightly awkward dimensions due to the door that leads into the kitchen and the pass through that separates it from the entry. Also, it isn't really separated from the den so it had to mesh well with the den. I drew the layout of this area to better explain.

We toyed with the idea of making it a reading nook, but ultimately decided we'd much rather have an actual place to eat (instead of eating on our couch every night). So, I began to plan. I had no idea that finding a table for this area would be so hard. The door into the kitchen was the ultimate problem. We couldn't have a table that was too wide or else it would block the door. I looked at so many tables and all of them were too wide. I tried a circle table temporarily and that was still too bulky. So finally, we decided to DIY it.
This DIY happened in two parts (and quite a few days). We started with the legs because I already had those. They are the LERBERG trestle legs from IKEA. They were originally black metal and I liked them, but when we decided to use them as our nook table legs, I didn't feel like the metal would go well in the space.

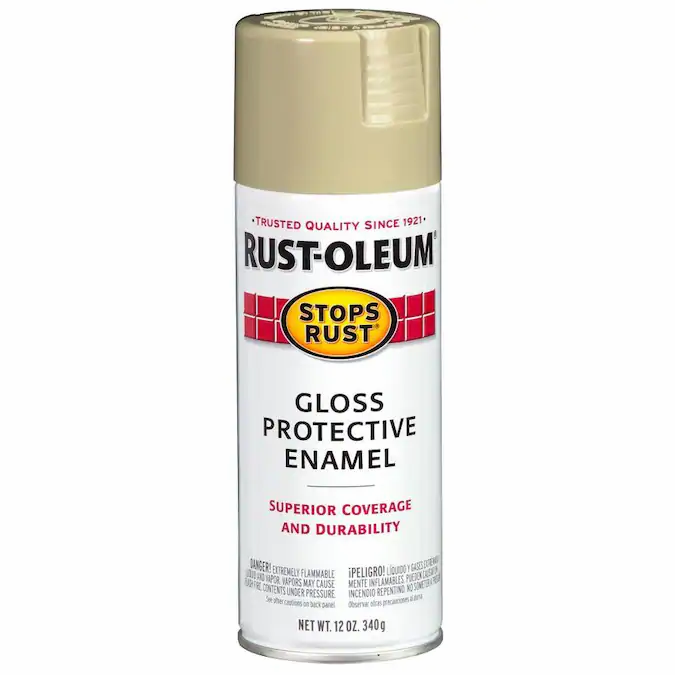
So I took them into the backyard determined to make them look like wood. With no idea how to do such a thing, I just went with it. I knew they were going to need a lighter base to start so I went hunting at Lowe's and picked up Rust-Oleum spray paint in Khaki. Of the options, it looked the most like light wood to me.
Once I got a good coat of spray paint on the legs, the next step was to give it some wood like detailing. I scoured the internet for idea. Most of them suggested a wood graining tool, but I was lazy and did not want to go back to the store. I also didn't want to go buy a tool I may never use again. So, I had to get creative. For the detailing, I used Minwax stain in Dark Walnut, a feather, and tooth brush. I wish I had some pictures of this, but I was really flying by the seat of my pants and didn't think to photograph it. So I will do my best to detail it with words.
First, I dipped the feather into the stain and lightly trailed it down part of the leg. Then, I took the toothbrush and rubbed over the stain to thin down the color and to make the edges feather out more. My hope was that this feathering and fading would make the stain look more like wood grain. To my great surprise it did! After feathering and fading for what felt like hours, the legs had all of their grain. I gave it a couple of hours to dry and when I came back I decided it still wasn't quite right. It still looked too dark and a little harsh. I wanted a slightly lighter wood look. So, I decided to go over the legs with a limewash to tone it down. I had some Valspar glaze on hand from a few previous projects. I love the stuff and find any excuse to use it.

So I took a dry brush and lightly brushed over the legs. I did a couple of coats until I was happy with the amount of white on the legs. A coat of sealant later and the legs were finally done!

Compared to the legs, the top was fairly straightforward. Again, I didn't really feel like going to the store again so I went hunting in our wood stash. Ultimately, we landed on some 1 x 6 boards that we had bought to make raised beds (that project will have to wait). We measured the width of our space and cut the boards down to fit. We left about an inch of wiggle room on each side. Once the boards were cut down we sanded down the edges to make the a little rounder and a little softer. We liked the look better and didn't want anyone to hurt themselves on the table!
Picking a stain was the hardest part of making the table top. I didn't want it to be too light, too dark, too red, etc. Finally, I settled for this Pecan stain I had found in the "oops" section at Home Depot. This stuff is SO easy to use. I had never seen it before but now I much prefer it to traditional stain (the liquid kind that comes in a can).

We put two coats of stain on both sides of the boards and then two coats of sealant in a glossy finish. After the boards were dry we connected them with two thin strips of wood.
Now it was time to connect the top and the legs. If you have any experience with the LERBERG trestle legs you know that they don't come with any way to attach a top. As people were going to be eating off this top, we weren't too hip on just laying the top on the legs. I had images of someone leaning on the table too close to the edge and the top flying off. So, we had to get creative. We turned the top upside down and positioned the legs where we wanted them. We made sure to leave enough space between the legs to comfortably fit two people because there is nothing worse than having to straddle a leg while you eat. We also made sure to leave enough space between the end and the leg so that if anyone was seated at the end they weren't rammed up against the leg.
So, once the legs were lined up we marked on the legs where we wanted the screws to go. We took the legs off and then pre drilled holes in the legs. I was expecting the metal to put up a fight but this actually went very smoothly. Once the holes were drilled we put the legs back on the table and screwed them in.
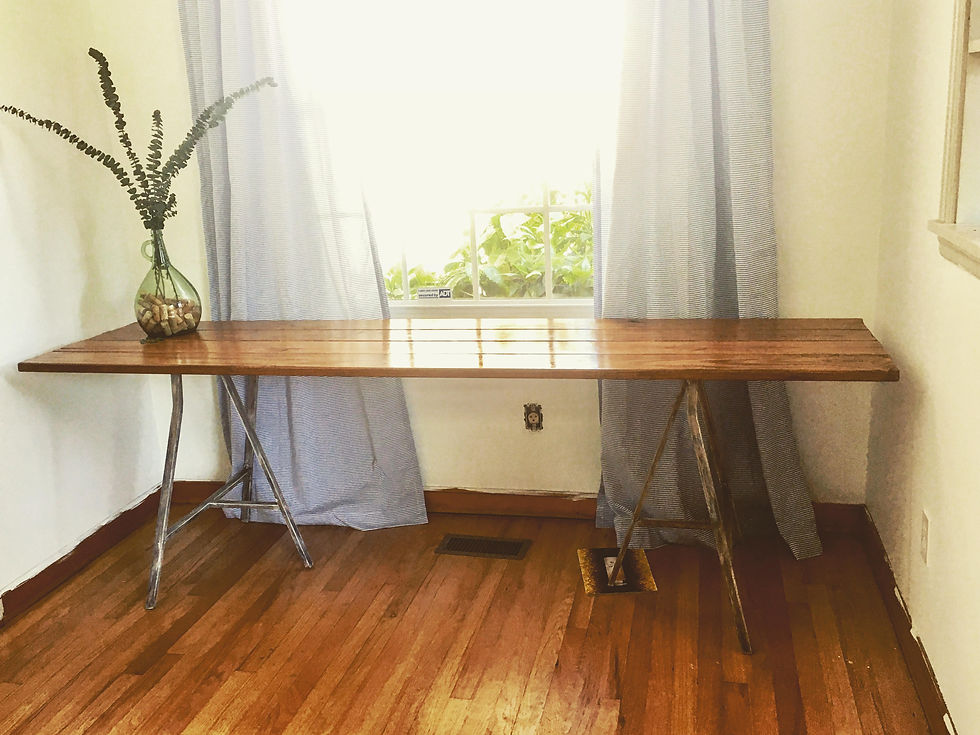
We flipped the table over and voila! Our new dining table was all ready for use. One last look at the the completed table.
and all styled up!
She's been in the nook now for about a month and she's holding up beautifully! We love eating dinner here every night!

PS. The light you see in the last picture will be featured in the Lighting: Part 2 post, coming soon!


Comments